STARTING WITH MYSQL
Create an Cloud9 account
– Go to https://c9.io
– Create an account
– It is FREE (but you have to provide a credit card number)
Initiate your mysql
Create a new terminal in Cloud9 and type the following command:
mysql-ctl start
You should see the following line:
 * Starting MySQL database server mysqld
   ...done.
Now you can start using mysql on the terminal.
This is a fully functional database management
system (DBMS). To work in mysql, type the following
mysql -u root
And if you see the message below, your installation is successful.
Welcome to the MySQL monitor.  Commands end with ; or \g.
Your MySQL connection id is 50
Server version: 5.5.49-0ubuntu0.14.04.1 (Ubuntu)

Copyright (c) 2000, 2016, Oracle and/or its affiliates. All rights reserved.

Oracle is a registered trademark of Oracle Corporation and/or its
affiliates. Other names may be trademarks of their respective
owners.

Type 'help;' or '\h' for help. Type '\c' to clear the current input statement.

mysql>
You can start writing your statements here:
show databases;
The results will be
+--------------------+
| Database           |
+--------------------+
| information_schema |
| c9                 |
| mysql              |
| performance_schema |
| phpmyadmin         |
| sakila             |
+--------------------+

6 rows in set (0.01 sec)
You can exit from mysql exit; command
Exit from MySQL:
exit;
Initiate your phpmyadmin
In your terminal write the following command:
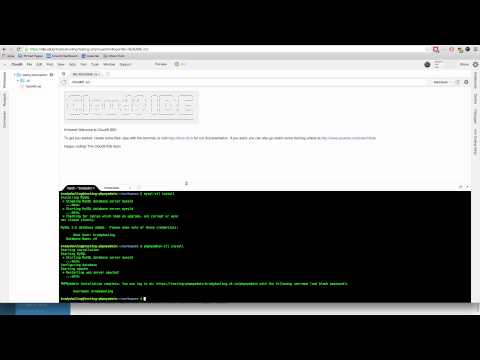
phpmyadmin-ctl install
You should see the following
Starting installation
Starting MySQL
 * Starting MySQL database server mysqld
   ...done.
Configuring database
Starting apache
 * Restarting web server apache2
   ...done.

PHPMyAdmin Installation complete. You can log in at: https://<your-workbench>-<username>.c9users.io/phpmyadmin with the following username (and blank password):

       Username: <your username>
You can click on the link provided in the message above and start php my admin
Alternatively you can follow the video below to set up your phpmyadmin